Homemade Baby Food Guide: Nutrient-Rich Solids
Discover the joy of homemade baby food with our comprehensive guide! Nutrient-packed, customizable, and cost-effective steps for a seamless transition to solids.
Guide to Homemade Baby Food: Steps, Benefits, and Tips for Introducing Solids
Transitioning from entire breastfeeding or formula feeding to solid foods is a crucial milestone in an infant’s development. Around 4 to 6 months of age, babies show signs of readiness for solid foods, such as holding their heads up, showing interest in what others are eating, and having reasonable control over their tongue. Baby food serves as a bridge between milk feedings and a more varied diet.
Homemade Baby Food:
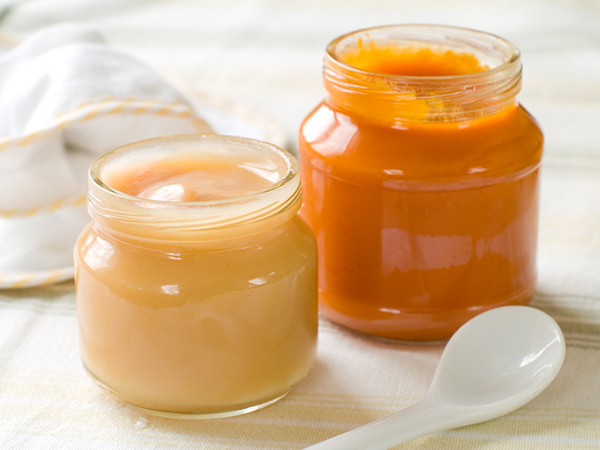
Homemade baby food involves preparing meals for your baby using fresh ingredients in your kitchen. Many parents opt for homemade baby food because it gives them control over the quality of ingredients, allowing them to offer whole, nutrient-rich foods without unnecessary additives or processing.
Advantages of Homemade Baby Food:
- Nutritional Control:
You have complete control over the ingredients, ensuring your baby receives wholesome and unprocessed foods rich in essential nutrients.
- Freshness:
Homemade baby food is made from fresh ingredients, often containing more nutrients than commercial options that might go through processing and preservation.
- Customization:
You can tailor the flavors and textures to suit your baby’s preferences and developmental stage. It can make the transition to solid foods smoother.
- Allergen Management:
Introducing potential allergens can be done gradually, under your supervision, allowing you to monitor any adverse reactions.
- Economical:
Making baby food at home can be cost-effective, especially if you buy ingredients in bulk or use leftovers from your meals.
Steps to Prepare Homemade Baby Food:
1. Choose and Prepare Ingredients:
Select fresh, organic produce, lean meats, and whole grains. Wash, peel, and remove seeds or pits as needed. Cut into small pieces for even cooking.
2. Cooking Methods:
Use methods like steaming, baking, or boiling. These methods help retain the nutrients better than cooking in excess water.
3. Texture Consistency:
As you introduce your little one to solid foods, considering texture is vital for their smooth transition. Like how their taste preferences evolve, so does their ability to handle different textures.
Let’s break it down into three easy stages:
- Young Babies (Around 4-6 Months): Smooth Start
Around 4 to 6 months, your baby’s tummy is still getting used to solids. Begin with smooth purees – consider these as the “baby steps” of solid foods. Take cooked ingredients and blend them until they’re super soft. This way, it’s gentle on their tiny tummies and easy to swallow.
- Growing Up (6-8 Months): Soft and Textured
As your baby gets a little older, usually between 6 to 8 months, they’re ready for more adventure. Introduce slightly textured purees with tiny soft pieces that let them explore new sensations. It’s like adding a pinch of excitement to their mealtime!
- Exploring Independence (8-10 Months): Bite-Sized Fun
When your baby reaches 8 to 10 months, they are ready to embark on a journey of small food exploration. Gentle, bite-sized pieces of soft foods are perfect. Imagine little bits of well-cooked veggies, fruits, and tender meats they can explore independently. It’s like letting them take small, safe bites of the world around them.
4. Equipment:
Use tools like blenders, food processors, hand blenders, or mashing utensils to achieve the desired texture.
5. Portioning and Storage:
Divide the prepared baby food into individual portions suitable for one feeding. You can use ice cube trays, silicone storage containers, or reusable pouches designed for baby food. Properly label and date them before storing them in the refrigerator or freezer.
6. Introducing New Foods:
Begin with single-ingredient purees and gradually introduce combinations as your baby becomes accustomed to different flavors and textures—Space out new introductions by a few days to watch for adverse reactions.
Tips for Homemade Baby Food:
- Safety First:
Always prioritize hygiene. Wash your hands, utensils, and surfaces thoroughly when preparing baby food. Refrigerate or freeze leftovers promptly.
- Balanced Diet:
For a well-rounded intake of nutrients, it’s essential to include a variety of fruits, veggies, low-fat protein bases, and whole grains in your diet.
- Texture Transition:
Gradually introduce thicker textures and small soft pieces as your baby progresses. It supports their oral motor skill development.
- Allergen Introduction:
Introduce allergenic foods individually and wait a few days before introducing another. It helps identify potential allergies.
- Consult a Pediatrician:
Before introducing solids, consult your pediatrician. They can guide you on when to start, what foods to teach, and any specific concerns based on your baby’s health.
Conclusion:
Remember, introducing solid foods aims to complement your baby’s milk diet while gradually guiding them toward a varied and balanced diet. Patience, observation, and responsiveness to your baby’s cues are essential as you embark on this exciting journey of discovering flavors and textures together.